
The Ultimate Guide to Moving House
Moving to a new house can be overwhelming. To alleviate some of the stress and help you navigate through this challenging time, we have created this guide of essential things you need to know – from planning and packing to logistics and settling into your new home.
Pre-move ↗
Everything you need to do before moving.
Moving Day ↗
Things to do on the moving day.
Post-move ↗
All the things you need to do after you move.
Part 1: Pre-move (Planning Stage)
This section includes guides on:
1. Property settlement guidelines for a smooth move
When it comes to property settlements, determining the right time to start your move can be a source of confusion.
To help simplify the process and ensure a stress-free move, we have compiled the following advice specifically for Queensland:
(Skip to the next step, decluttering, if you’ve already reviewed property settlement section.)
Single Property Settlements:
- If you are buying a property, it is advisable to plan your move for the day after the settlement.
- If you are selling a property, consider moving out the day before the settlement.
There are several reasons why it is advisable to move in the day after settlement when buying a property and move out the day before settlement when selling a property.
- Smooth transition: Moving in or out on separate days helps ensure a smooth transition between the previous and new occupants. It allows sufficient time for the legal and financial aspects of the property transfer to be completed without the added stress of coordinating the physical move.
- Documentation and paperwork: Settlement days typically involve extensive paperwork and legal formalities, including signing contracts, transferring titles, and finalising financial transactions. By separating the move-in or move-out day from the settlement day, you can focus on completing the necessary paperwork without the distraction and logistical challenges of physically moving your belongings.
- Property condition assessment: Moving out before settlement when selling property allows potential buyers to conduct a final inspection to ensure the property is in the agreed-upon condition. This inspection ensures that there are no unexpected damages or issues that may have occurred during the moving process.
- Liability and insurance: Moving out before settlement reduces the risk of any accidents or damage occurring during the moving process. Once settlement has taken place, the new owners assume responsibility for the property, and any damage caused during the move could become the buyer’s liability. Moving after settlement provides peace of mind and avoids potential complications related to insurance coverage.
- Logistics and scheduling: Separating the move-in or move-out day from settlement day allows for better logistical planning. You can coordinate with professional movers, utility companies, and other service providers well in advance, ensuring that everything is scheduled appropriately and reducing the likelihood of any last-minute complications.
While these recommendations are generally advisable, it’s important to note that specific circumstances may vary. It’s essential to consult with your real estate agent, legal advisor, or other professionals involved in the transaction to determine the most appropriate timeline for your specific situation.
Double Property Settlements:
- If you are both selling and buying properties, and the contracts have been arranged to settle on the same day, you have what is called a double property settlement.
During a double property settlement, it is crucial to carefully coordinate the timing of your move.
Solicitors are legally obligated to provide advice on the settlement process. In simple terms, you should vacate your current home before the settlement and refrain from moving into your new home until after the settlement.
The actual settlement time is determined through a mutual agreement among all parties involved, including solicitors and finance professionals. Typically, the settlement time is not finalised until about three days prior to the event. It is important to note that settlement times often experience last-minute changes on the actual day, making it challenging for movers to accommodate these unpredictable time constraints.
To address this dilemma, we recommend following these steps:
- Contact all other parties directly or through your real estate agent and strive to reach a mutually suitable time for everyone involved.
- Once an agreement has been reached, inform your solicitor about the agreed-upon arrangements.
- This is the ideal time to book your moving service to ensure availability on the agreed-upon date.
In addition, consider the following helpful points:
- If the sellers of the property you are purchasing plan to move out before settlement day, try to secure access to the keys and commence your move early on the settlement day.
- If the buyers of your current property are not planning to move in until after the settlement day, you may consider scheduling your move for the afternoon of the settlement day.
- If all parties involved are moving on the same day, it is advisable for everyone to start their moving services at the same time to streamline the process.
- It is generally recommended to avoid moving across the settlement time to prevent potential complications. If any issues arise, feel free to seek advice from professionals.
- Separate settlement dates. If you are both buying and selling properties, and the settlement dates do not align, we suggest considering the following options:
- Secure a temporary rental property for the interim period.
- If a rental property is not available, you may consider storing your belongings at one of the properties, such as in a garage. Only as a last resort should you consider using a storage company, as it significantly increases moving costs.
*Please note that the information provided in this section is specific to Queensland. It is important to seek legal advice tailored to your situation to ensure compliance with relevant regulations and requirements.
The settlement is finalised! But while it’s an exciting milestone, there are still a few important things you need to do before the big day.
2. Decluttering
Decluttering before your moving day is a crucial step that can greatly simplify and streamline your house move. It involves going through your belongings and intentionally deciding what to keep, donate, sell, or discard.
Decluttering is beneficial as it not only reduces moving costs but also saves you time and effort when it’s time to pack and unpack your things. It also helps you create a fresh start, and at the same time help others by donating things you no longer need but may still be valuable to others.
Here are a few tips for decluttering:
- Start early: Decluttering can be a time-consuming process, so it’s best to start as early as possible. Begin with one room or area at a time to avoid feeling overwhelmed.
- Sort items into categories: Create categories such as “keep,” “donate,” “sell,” and “discard.” Assess each item individually and decide which category it belongs to based on its value and usefulness.
- Consider your lifestyle and needs: When deciding what to keep, consider your current lifestyle and needs. Ask yourself if the item serves a purpose, brings you joy, or holds sentimental value. If not, consider letting it go.
- Take it step by step: Break down larger spaces or areas into smaller sections. This helps maintain focus and prevents decision fatigue. For example, tackle one closet shelf or one drawer at a time.
- Sell or donate unwanted items: For items in good condition that you no longer need, consider selling them, organising a garage sale, or donating them to local charities. This not only helps declutter but also gives these items a chance to find new homes.
- Dispose of unusable items responsibly: Properly dispose of items that are broken, damaged, or no longer functional. Check local regulations or recycling centres for guidance on the responsible disposal of electronic waste, hazardous materials, and other items.
- Involve your family or friends: If appropriate, involve your family or friends in the decluttering process. Their input and assistance can make the task more enjoyable and efficient.
Remember, decluttering is a personal process, and everyone’s threshold for what to keep or let go of may vary.
3. Packing
It’s astonishing how many things we accumulate over time, which can make it even more overwhelming to prepare for the move.
These tips should help you stay organised and minimise stress during the moving process.
- Start early: Packing always takes longer than expected, so it’s best to start as early as possible. It’s also recommended to order your moving boxes in advance. It’s always better to be prepared with more boxes than you anticipate needing. Running out of boxes in the middle of packing can disrupt your progress. Get a variety of sizes and types of boxes so you have options for packing different items, and make sure to use durable ones to keep your belongings safe during transportation.
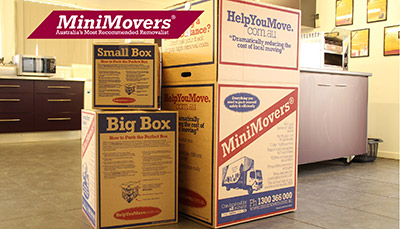
- Choose the right moving boxes: When packing, the quality of the boxes is crucial. Use appropriately sized moving boxes for specific items to make the process easier. Here are some guidelines:
- Small moving boxes: Perfect for dense and heavy items like books, glassware, small appliances, and sheet sets.
- Big moving boxes: Ideal for lightweight and bulky items such as pillows, comforters, stuffed animals, and seasonal clothing.
- Specialty boxes: Consider using portable wardrobe boxes to pack your clothing directly from your closet without folding or removing them from hangers.
- Gather packing supplies: Collect all the necessary packing supplies before you start packing. This includes moving boxes in various sizes, butchers paper, bubble wrap, mattress bags, and other packing materials such as packing tape, scissors, a cutter, a ruler, a handheld tape dispenser, sharpie markers, sticker papers, and coloured labels. Store these items in a handy plastic storage box, and return them to the kit after each use to save time searching for them later.
- Label and colour code your boxes: Proper labelling is essential for an organised move. Remember, you’re not just packing one box but your entire house. To ensure you pack items for each room correctly, label your boxes with coloured stickers or papers indicating the room they belong to. This will also make it easier to unpack and place items in their appropriate locations once you arrive at your new place.
- Keep valuables with you: To ensure the safety of your valuable items, such as important documents, jewellery, or sentimental belongings, keep them in a safety box and transport them in your personal vehicle during the move. This way, you won’t need to worry about them getting lost or damaged during transportation. It is also advisable to pack essentials separately. Prepare a separate box or suitcase containing essential items you’ll need immediately upon arrival at your new home, including toiletries, a change of clothes, important documents, chargers, and any necessary medications. Keep this box easily accessible so you can quickly access them when needed.
- Protect fragile items: Wrap fragile items, such as glassware, ceramics, or delicate electronics, with bubble wrap, cloth, or towels to provide cushioning and prevent damage. Take extra care when packing these items to ensure their safe arrival at your new home. This does not only reduce the risk of damaging your fragile items but using towels and clothing as protection also utilises the space efficiently.
- Take photos of electronic setups: Before unplugging electronics such as TVs, computers, or gaming systems, take photos of the cables and connections. This will make it easier to set them up correctly in your new home.
- Stay patient and calm: Moving can be a hectic process, but it’s important to stay patient and organised while packing. Avoid rushing and focus on the task at hand. If you find the packing process overwhelming, consider hiring professional packers who can assist you efficiently and alleviate some of the stress.
Remember, the key to successful packing is organisation, planning, and giving yourself ample time to do everything.
Check out some of our helpful packing guides:
MiniMovers Packing Tips and Hints
Techniques for Pre-Packing Fragile Items
4. Storage
If you find yourself in a situation where you need to temporarily store your belongings between house moves, it is crucial to determine the most suitable type of storage for your needs.
Storage Types:
When it comes to professional storage options, there are generally two choices available: general storage and self/mini storage.
General storage refers to storage options that are typically available within residential or commercial buildings. These storage spaces are commonly provided by the property owner or manager and may be included as part of a rental agreement or lease. These storage facilities can be found in apartment complexes, office buildings, or warehouses.
Items are stored in a shared or communal area, often within a designated storage room or facility.
While general storage offers a convenient solution for temporary storage needs, it is important to note that the level of security, access, and protection for stored items can vary. Loss and damage of items are common occurrences, and accessing your stored belongings can be challenging.
Self-storage on the other hand is a specific type of storage service where individuals or businesses can rent their private storage units. Unlike general storage, self-storage provides more control and flexibility over storage space.
In self-storage, you can choose the size of the storage unit based on your specific needs. These units are typically located within dedicated self-storage facilities and come in various sizes, ranging from small lockers to large rooms or even outdoor storage spaces. The units are usually secured with a lock, and only the renter has access to the unit.
Within the self-storage industry, there are two types of companies: those with on-site managers and those that utilise booking agents. Storage facilities with on-site managers generally offer superior service and security. It’s advisable to avoid storage facilities that rely solely on fences or security companies to secure the area. The ideal storage facility for you would typically be one that is closest to your location, has on-site managers, and provides a range of unit sizes to meet your specific requirements.
You can check the nearest self-storage facility with an on-site manager here.
A few tips for storing your belongings:
- Organise and plan your storage space: Prioritise items you may need to access frequently and place them in an easily reachable location within your storage unit.
- Pack items strategically: Packing things on top of each other helps save space and reduce costs. Place something protective between surfaces to prevent damage. You can use old blankets, sheets, curtains, or similar items as padding.
- Properly pack and protect: Speaking of packing, it’s essential to take your time preparing your packing materials. Prepare sturdy boxes, packing tape and bubble wrap. It’s also recommended to use naphthalene, mothballs, or similar products to safeguard your goods. For batteries, make sure to remove them from battery-operated items. For long-term storage, wrap silver in non-acidic tissue paper or plastic bags to prevent tarnishing. Apply a small amount of machine oil to chrome or cast iron to prevent rust.
- Prepare white goods: Clean and dry fridges, freezers, and other appliances before storing. Keep the door slightly ajar for air circulation. Place a deodoriser inside to maintain freshness. Avoid placing items inside as shelves and linings can get marked or damaged.
- Avoid storing flammable items: For safety reasons, never store flammable liquids, fuels, or hazardous materials in your storage unit.
- Choose appropriate storage containers: Opt for breathable materials like cardboard boxes instead of plastic to prevent moisture buildup and allow air circulation.
- Protect fragile items: Use proper paddings, such as bubble wrap or foam, for delicate items like glassware, mirrors, or artwork. Store them on their edges, not flat, with a layer of cardboard underneath for added protection.
- Use sheets or covers: Cover furniture, mattresses, and other large items with sheets or furniture covers to prevent dust accumulation and protect them from scratches or damage.
- Consider climate-controlled storage: If you’re storing sensitive items like electronics, wooden furniture, or valuable artwork, consider renting a climate-controlled storage unit to protect them from extreme temperatures, humidity, and moisture.
Remember to consult any specific guidelines or regulations provided by your chosen storage facility for additional tips and requirements when storing your belongings.
5. Moving checklist
Preparing for a move can be overwhelming, and sometimes all you need is a quick checklist to guide you throughout the process.
If you’re someone who likes to work off a checklist, we have put together a FREE downloadable Ultimate Moving Checklist for you.
6. Booking your move
Now that all the preparations are done, it’s time to book your move! But before you do so, here are a few things to consider:
- Research and gather recommendations: Take the time to research different moving companies in your area. Seek recommendations from friends, family, or online platforms to find reputable and reliable options.
- Check credentials and insurance: Ensure that the removalist company you are considering is properly licensed and insured. This helps protect your belongings during the move and gives you peace of mind knowing you’re working with professionals.
- Obtain multiple quotes: Request quotes from different removalist companies to compare prices and services. Be cautious of unusually low prices, as they may indicate poor service quality or hidden charges. Consider companies that offer hourly-rate systems as this can help you save cost. Ultimately, aim for a balance between affordability and reliability.
- Services offered: Assess the range of services provided by the removalist. Do they offer packing and unpacking assistance? Will they handle fragile or valuable items with care? Determine if their services align with your specific needs.
- Reviews and testimonials: Read reviews and testimonials from previous customers to gauge the reputation and customer satisfaction of the removalist company. This feedback can give you insights into their reliability, professionalism, and overall service quality.
- Availability and scheduling: Ensure that the removalist company can accommodate your preferred moving date and time. It’s essential to book early, especially during peak moving seasons, to secure their services.
- Ask about insurance coverage: Inquire about the insurance coverage provided by the removalist company. Ask if they offer No-Damage Guarantee. It’s crucial to understand the extent of their liability in case of any damages or loss during the move.
Once you settled on a company, follow these steps to book your move:
- Contact the removalist: Reach out to the removalist company through phone, email, or website to initiate the booking process.
- Provide details: Furnish the necessary details about your move, such as the date, the size of your home, the number of items, and any specific requirements you may have.
- Request a quote: Ask for a detailed quote that outlines the cost of their services, any additional charges, and the scope of work they will provide.
- Confirm the booking: Once you are satisfied with the quote and have clarified any queries, confirm the booking by providing the required information, such as your name, contact details, and the moving addresses.
- Read and sign the contract: Carefully read the terms and conditions provided by the company. Ensure that you understand all the clauses and sign the contract only when you are comfortable with the terms.
- Prepare for the move: Follow any instructions or recommendations provided by the removalist company to prepare for the moving day. This may include packing guidelines, labelling requirements, or any other specific instructions.
Part 2: Moving Day
Congratulations! You’ve done all the necessary preparations for your move! But it’s not the end of the process yet. To ensure a smoother move, here are some essential tasks to consider during the moving day:
- Coordinate with removalists: One of the first things to do on the day of your move is to coordinate with your removalists. Confirm the arrival time and any specific instructions they may have. Stay in touch with them throughout the day to address any questions or concerns that may arise.
- Supervise packing and loading: As the move progresses, it’s important to supervise the packing and loading process. Ensure that fragile items are appropriately packed and labelled, and provide clear instructions to the movers regarding the handling of delicate or valuable possessions. By overseeing these activities, you can ensure that your belongings are being handled with care.
- Carry essential documents: During the chaos of the moving day, it’s easy to misplace important documents. To prevent this, gather all essential documents such as passports, identification cards, contracts, and any relevant paperwork and carry them with you. Keeping them in a designated folder or bag will ensure they remain safe and easily accessible.
- Check every room: Before leaving your old home, take the time to check every room thoroughly. Double-check closets, cabinets, and drawers to ensure you haven’t left anything behind. Look for forgotten items or overlooked personal belongings to ensure nothing is left behind.
- Confirm utilities and services: Before leaving your old home, make sure to confirm that all utilities (electricity, water, gas) have been properly disconnected. Notify the respective service providers of your move-out date and arrange for the transfer or cancellation of services as needed. This will prevent any unexpected bills or service interruptions.
- Clean every room and dispose of garbage: Leave your old home in a clean and tidy condition. Once everything is packed and loaded onto the moving truck, go through each room and clean it. Dust surfaces, sweep or vacuum the floors, and wipe down any surfaces that need it. Additionally, dispose of any garbage or unwanted items responsibly.
- Leave keys: Before departing from your old home, make sure to leave the keys as agreed with the new occupants or the landlord. Whether it’s handing the keys over to the new homeowner or leaving them in a designated spot, ensure a smooth transition for everyone involved.
- Notify important parties of your new address: Finally, notify important parties, such as banks, insurance companies, government agencies, and subscriptions, of your new address. Update your address details to ensure that important mail and documents are forwarded correctly to your new house.
Part 3: Post-move
Now that you’re settled into your new home, you might be asking yourself, what now?
It may seem pretty overwhelming, especially after all the preparations and tasks you’ve undertaken before the move, but don’t fret! This list of things to do should guide you in the right direction.
- Take your time unpacking and organising. Moving into a new home can be exciting, but it’s important not to rush this process. This may seem obvious, but unpacking and organising your belongings should be a top priority. Start with the essentials like bedding, kitchenware, and toiletries, and then move on to the less important items. This is also why it’s important to organise your things and label boxes by category as it will make unpacking much easier later on. Don’t be afraid to experiment with different layouts and configurations until you find the perfect setup that works for you. But before you do all this, you might want to consider doing the next tip first.
- Deep cleaning. Even if your new home looks clean, it’s a good idea to give it a deep clean before fully settling in. Start by dusting and wiping down all surfaces, including countertops, shelves, and cabinets. Make sure to use a good quality cleaning product that can remove any grime and germs. Clean the floors and carpets by vacuuming and mopping them thoroughly. Sanitising the bathrooms and kitchen areas is also crucial as these spaces can harbour harmful bacteria and germs, so make sure to use a disinfectant solution that is safe and effective. You may also want to consider replacing any toilet seats or shower curtains to ensure that they are clean and fresh. However, if you don’t have the time to do all the cleaning, you may consider a house-cleaning service.
- Get to know your new neighbourhood. Moving to a new area can be daunting, but it’s also an opportunity to explore and discover new places. Take some time to walk or drive around your new neighbourhood and get familiar with the local shops, restaurants, and attractions. Introduce yourself to your new neighbours and ask for recommendations on their favourite spots in the area.
- Update your address and contact information. Make sure to update your address and contact information with all of your important contacts, including banks, credit card companies, utilities, and any subscriptions you may have. This will ensure that you continue to receive important mail and updates and avoid any missed payments or service interruptions.
- Set up your home security. One of the first things you should do after moving into a new home is to ensure that your home is secure. Install new locks on all exterior doors and consider installing a security system or camera to protect your home and belongings. It’s better to be safe than sorry, and taking these steps can give you peace of mind and help you feel more secure in your new home.
- Make any necessary repairs or upgrades. Take some time to assess your new home and identify any repairs or upgrades that may be necessary. This could include fixing leaky faucets, replacing outdated appliances, or repainting walls. Addressing these issues early on can help prevent them from becoming larger, more expensive problems down the road.
- Create a maintenance plan. Owning a home comes with a certain level of responsibility, and it’s important to have a plan in place for ongoing maintenance and upkeep. Create a schedule for regular tasks like cleaning gutters, changing air filters, and checking smoke detectors. By staying on top of these tasks, you can help ensure that your home stays in good condition and avoid any unexpected repairs or expenses.
- Make it feel like home. Finally, take some time to add personal touches and make your new home feel like your own. This could include hanging family photos on the walls, adding cosy throw pillows and blankets, or incorporating your favourite colours and decor. The more you can make your new home feel like a reflection of your style and preferences, the more comfortable and happy you’ll feel in your new space.
You’ve done an excellent job of ensuring a smooth transition to your new home! Now, take the time to enjoy your new space and embrace the opportunities that come with a fresh start.
For more moving and packing tips, check out MiniMovers Moving, Packing Hints and blogs.
Featured image by Blue Bird